How to Add Google Fonts to Your HTML Website

we’ll walk through the process of adding Google Fonts to your HTML website. We’ll use a simple example to demonstrate how to enhance your site’s typography with a custom font from Google Fonts. Let’s get started!

Step 1: Choose Your Font
- Visit Google Fonts: Open your web browser and navigate to Google Fonts. This site offers a wide variety of free fonts that you can use to customize the look of your website.
- Browse Fonts: You can browse through the available fonts on the homepage. Popular choices include Roboto, Open Sans, and Inter. For this example, we’ll use the Inter font.
- Select Your Font: Click on the font you want to use. This will open the font details page.
- Pick Font Weights: Scroll down to the section where you can select font weights. Choose the weights you want, such as Light, Regular, Medium, Semi-Bold, and Bold. These options control the thickness of the text.
Step 2: Copy the Font Link
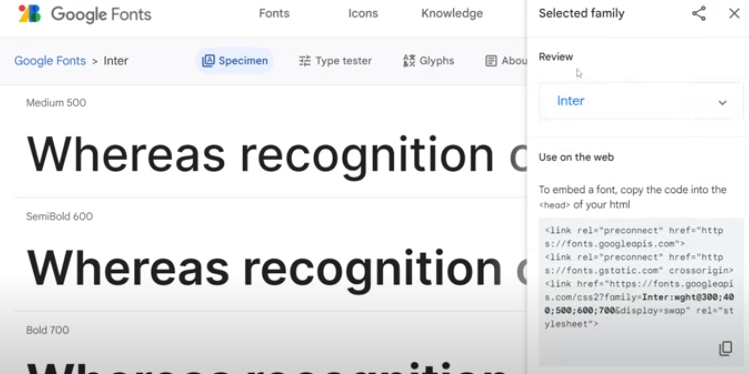
- Open the Embed Options: After selecting your preferred weights, look for the icon that allows you to view the embed options. In the past, this would open a sidebar automatically, but now you may need to click on an icon to see it.
- Choose Your Embed Method: You’ll see two methods for embedding the font:
- Import in CSS: Useful if you are managing your fonts within CSS.
- Link in HTML: The more common method, where you add a link tag to your HTML file.
- Copy the Link Tag: For this tutorial, we’ll use the HTML link method. Copy the provided link tag. It will look something like this:
<link href="https://fonts.googleapis.com/css2?family=Inter:wght@400;700&display=swap" rel="stylesheet">Step 3: Add the Font Link to Your HTML
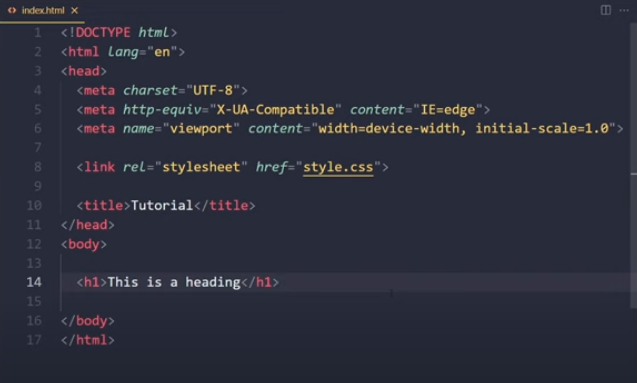
- Open Your HTML File: Open the HTML file of your website in your text editor.
- Paste the Link Tag: Add the copied link tag inside the
<head>section of your HTML file. Place it before your own stylesheet link, if you have one. It should look like this:
   <!DOCTYPE html>
   <html lang="en">
   <head>
       <meta charset="UTF-8">
       <meta name="viewport" content="width=device-width, initial-scale=1.0">
       <title>Document</title>
       <link href="https://fonts.googleapis.com/css2?family=Inter:wght@400;700&display=swap" rel="stylesheet">
       <link rel="stylesheet" href="styles.css">
   </head>
   <body>
       <h1>This is a heading</h1>
   </body>
   </html>
Step 4: Apply the Font in CSS
- Open Your CSS File: Open the CSS file where you’ll define the styling for your website.
- Set the Font Family: To apply the font, use the
font-familyproperty. Typically, you’ll apply this to thebodyelement to ensure all text elements inherit the font. Add the following CSS:
   body {
       font-family: 'Inter', sans-serif;
   }
This code specifies that the primary font is Inter. If Inter is not available, the browser will use a generic sans-serif font as a fallback.
- Save Your Changes: Save your CSS file and refresh your browser to see the changes.
Step 5: Verify and Adjust
- Refresh Your Website: Open your website in a browser and refresh the page. You should see the new font applied to your text.
- Adjust as Needed: If you want to switch fonts or adjust weights, return to Google Fonts, select a different font or weight, and update your link tag and CSS accordingly.
Conclusion
And that’s it! You’ve successfully added a Google Font to your HTML website. By following these steps, you can easily change the look of your site and improve its design with custom typography. If you found this guide helpful, don’t forget to like and subscribe for more tutorials. For advanced skills, check out courses on CSS and JavaScript, and stay tuned for upcoming courses on React and Node.js. Happy coding!